Getting Started
On this page, you will find instructions on how to set up the development environment, build the application, and run it on supported hardware. We will focus on using command line tools in this document, but you can also use nRF Connect for VS Code to achieve the same if you prefer that.
In nRF Connect for VS Code, the Asset Tracker Template is available as an add-on in the Create New Application menu:
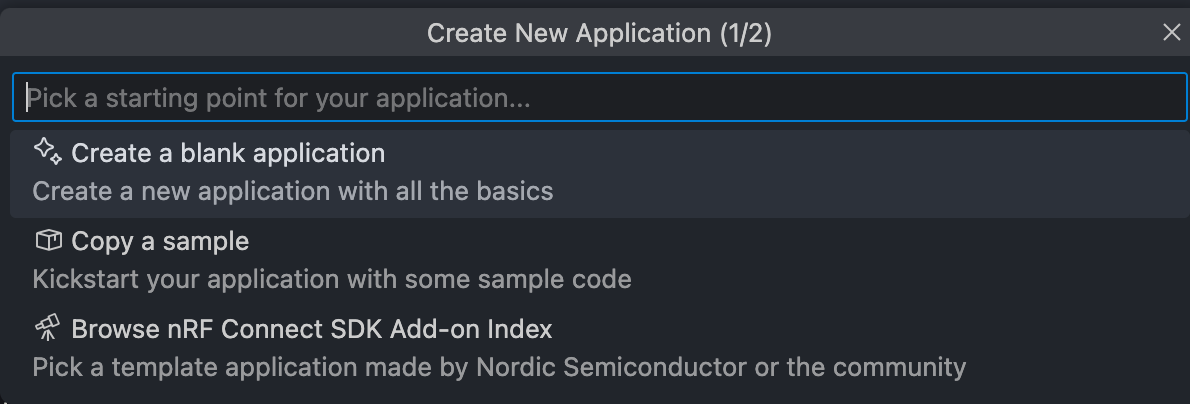
Select the Browse nRF Connect SDK add-on Indexoption and search for Asset Tracker Template.

For more details on how to use the VS Code extension, refer to the nRF Connect for VS Code documentation.
Prerequisites
- The nRF Util command line tool and the SDK manager command
- First, install nRF Util by following the instructions in the nRF Util documentation
- Then, install the SDK manager command by following the instructions in the sdk-manager command documentation.
- nRF Connect SDK toolchain v3.0.0 or later
- Follow the instructions in the sdk-manager command documentation to install v3.0.0 of the nRF Connect SDK toolchain.
Supported boards
The Asset Tracker Template is continuously verified in CI on the following boards:
- Thingy:91 X
- Build target
thingy91x/nrf9151/ns
- Build target
- nRF9151 DK
- Build target
nrf9151dk/nrf9151/ns
- Build target
Workspace Initialization
Before initializing, start the toolchain environment:
nrfutil sdk-manager toolchain launch --ncs-version v3.0.0 --shell
Alternatively, you can run the command with a specific nRF Connect SDK version. For example, if you are using version 3.0.1, run:
nrfutil sdk-manager toolchain launch --ncs-version v3.0.0 -- <your command>
to run for instance the west command with the specified version of toolchain. Creating an alias or shell function for this command can be helpful to avoid typing it in full every time.
However, going forward in this document, we will use the nrfutil toolchain-manager launch --shell variant to launch the toolchain environment in the shell.
To initialize the workspace folder (asset-tracker-template) where the firmware project and all nRF Connect SDK modules will be cloned, run the following commands:
# Initialize asset-tracker-template workspace
west init -m https://github.com/nrfconnect/Asset-Tracker-Template.git --mr main asset-tracker-template

cd asset-tracker-template

# Update nRF Connect SDK modules. This may take a while.
west update
The template repository is now cloned into the asset-tracker-template folder, the west modules are downloaded, and we are ready to build the project.
Building and running
Complete the following steps for building and running:
- Navigate to the application folder:
# Assuming you are in the asset-tracker-template folder
cd project/app
- To build the application, run the following command:
west build -p -b thingy91x/nrf9151/ns # Pristine build
- When using the serial bootloader on Thingy:91 X, you can update the application using the following command:
west thingy91x-dfu
- When using nRF9151 DK or an external debugger on Thingy:91 X, you can program the device using the following command:
west flash --erase # The --erase option is optional and will erase the entire flash memory before programming
The application is now built and flashed to the device. You can open a serial terminal to see the logs fromTest that it all works the application. The default baud rate is 115200. We suggest using the Serial Terminal application that comes with nRF Connect for Desktop. You can also use other serial terminal applications like PuTTY, Tera Term, or minicom.
Builing with overlays
You can build the application with different overlays to enable or disable certain features. The following are some examples of how to build the application with different overlays.
Debug build with Memfault:
west build -p -b thingy91x/nrf9151/ns -- -DEXTRA_CONF_FILE="overlay-memfault.conf;overlay-upload-modem-traces-to-memfault.conf;overlay-etb.conf" -DCONFIG_MEMFAULT_NCS_PROJECT_KEY=\"memfault-project-key\"
Build with Memfault, sending modem traces to Memfault and enabling ETB traces:
west build -p -b thingy91x/nrf9151/ns -- -DEXTRA_CONF_FILE="overlay-memfault.conf;overlay-upload-modem-traces-to-memfault.conf" -DCONFIG_MEMFAULT_NCS_PROJECT_KEY=\"memfault-project-key\"
Provision device to nRF Cloud
To be able to use the nRF Cloud features, you need to provision your device to nRF Cloud and associate it with your account. The following steps will guide you through the provisioning process, using nRF Cloud Utils.
Requirements
Ensure you have an active nRF Cloud account. If not, register at nrfcloud.com. To locate your API key:
- Log in to your nRF Cloud account.
- Click the menu icon (often referred to as a “burger icon”) in the top-right corner.
- Navigate to your user account details. Your API key will be listed there. If you are a member of multiple teams on nRF Cloud, each team will have a distinct API key. Verify you are using the API key associated with the correct team.
The following provisioning steps require that the Asset Tracker Template application has been successfully built and flashed to your device. If you have not yet completed this, refer to the Building and running section.
Install nrfcloud-utils package:
pip3 install nrfcloud-utils
Refer to the nRF Cloud Utils documentation for more information on the commands and their usage.
Steps
Provisioning the device involves writing credentials to the nRF91 device. To do so, LTE needs to be disabled. Open device shell via serial and set network disconnect mode using the following command:
att_network disconnect
nRF Cloud Utils communicates with the device over the serial port, so you need to disconnect from the serial port before proceeding with the next steps. Refer to the nRF Cloud Utils documentation for more information on the commands, their usage and the available options.
Create a self-signed CA certificate and private key:
create_ca_cert
Now, you should have three .pem files containing the key pair and the CA certificate of your local certificate authority. The files are named as follows:
*_ca.pem- CA certificate*_prv.pem- CA private key*_pub.pem- CA public key
Install credentials onto the device:
device_credentials_installer -d --ca *_ca.pem --ca-key *_prv.pem --coap --cmd-type at_shell
Upon success, you can find an onboard.csv file with information about your device. We need this file to register the certificate with your account.
In this step, you will also be prompted to enter your nRF Cloud API key that you obtained earlier.
nrf_cloud_onboard --api-key $NRFCLOUD_API_KEY --csv onboard.csv
Your device should now be registered to your account on nRF Cloud.
Test that it all works
To test that everything is working as expected, you can do the following:
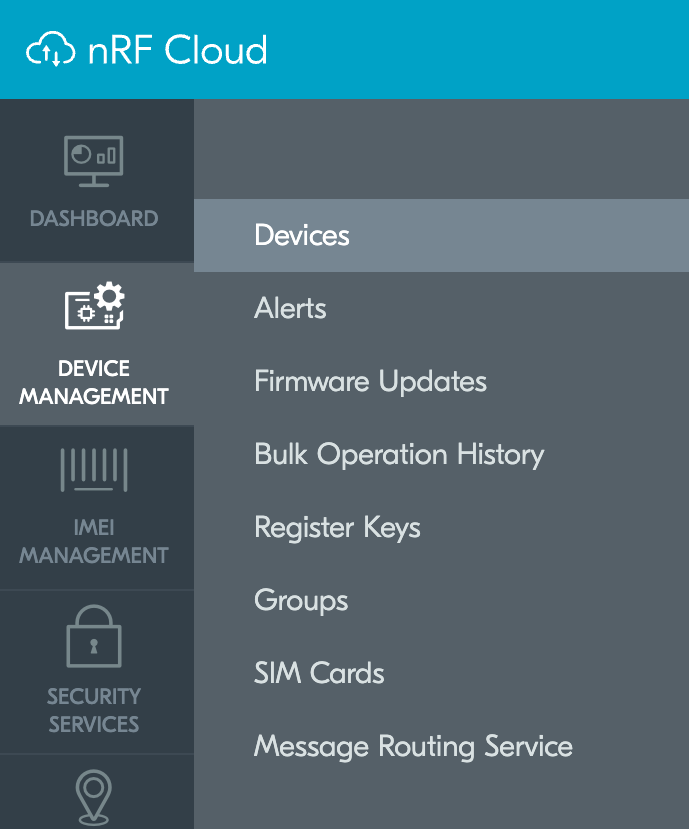
- In a web browser, navigate to nRF Cloud and log in to your account. Navigate to the
Device managementmenu and selectDevices, as shown below. You should now see your device listed in the device overview. Click on the device ID to see the device page.
- Connect to the device using the serial terminal and reset the device using either the reset button or the following shell command:
kernel reboot
- In the serial terminal, you will see the device booting up and connecting to the network. The device will attempt to connect to nRF Cloud using the credentials you provided during provisioning.