How to work with a build configuration
After creating an application, you must set up a build configuration to build an application. A build configuration is essentially a CMake build system composed of different configuration options.
How to set up a build configuration
To set up a build configuration:
-
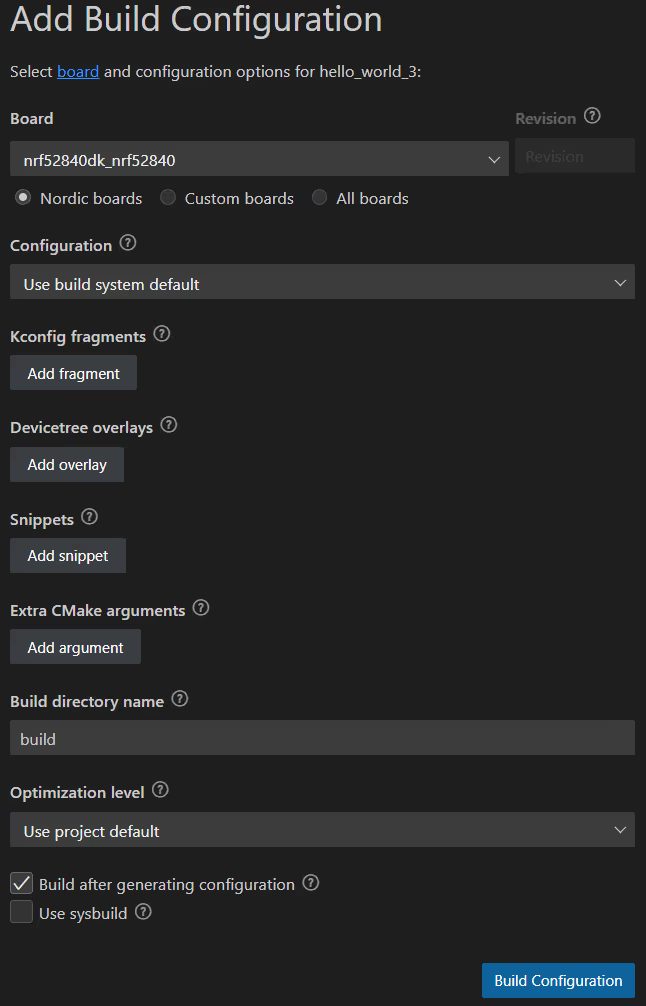
In the Applications View, click on Add build configuration.

This opens the Add Build Configuration page.
-
Optionally, specify the board revision. The build system will match the revision to the best available board revision configuration files. If there is a discrepancy, the build system will set the available board revision as active.
-
Fill in the configuration options according to your project needs (see the fields' tooltips.) If you want to use a new custom board, make sure to add the new board first.
Note
The nRF Connect SDK has a preference for where to build overlay files. Read more about this in the nRF Connect SDK devicetree overlay documentation. VS Code implements this rule set to determine which files should end up in the build, but ultimately it is the build system that decides. The most commonly used location is
<application-root>/<board-id>.overlay.For example, for a build of the
peripheral_lbssample for thenrf52dk_nrf52832build target, thenrf52dk_nrf52832.overlayfile will be stored atsamples/bluetooth/peripheral_lbs/.You can set custom overlay files by passing the argument
-- -DDTC_OVERLAY_FILE=path/to/an/overlay_file.overlayin the Extra CMake arguments field when generating a build. -
Optionally, select one of the available optimization levels. If you want to debug your application after building it, select Optimize for debugging. This option enables additional extension-specific debugging features after the application is built.
-
Optionally, select one of the following checkboxes:
- Build after generating configuration - Select to build the application after the configuration file is generated. This option is always selected by default.
- Use sysbuild - Select to use sysbuild if you are working with an application for multiple cores or domains that is based on the nRF Connect SDK and toolchain v2.4.0 or higher.
You can later change these settings when you edit the build configuration.
-
Click Build Configuration. The application starts building and a progress notification appears, as it can take some time. During this process, the Sidebar is populated with several new Views and the build files appear in the Details View, which is named after your application (
TEST-APPin the following image.)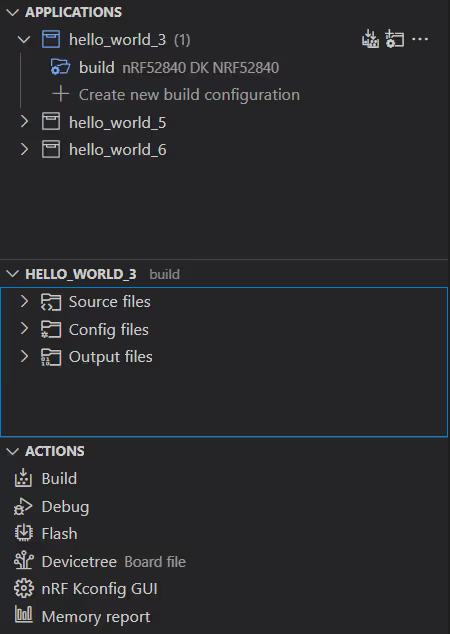
Once the build is complete, a build configuration entry is added for the application in the Applications View. You can hover over this entry to check the Build configuration details.
Tip
Standard CMake build configurations have a gear icon. A build configuration created using sysbuild has a wrench icon in the Application View and a sysbuild-specific file structure in the Details View.
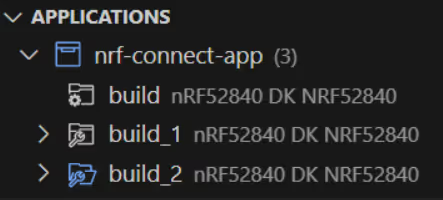
At this point, you can also use the Build action from the Actions View to rebuild the application.
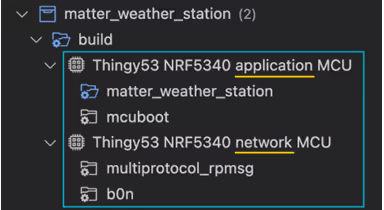
If a build configuration has child images that target different cores, the extension groups these images according to the separate cores.
How to specify the board revision
If you select a board that has revisions, then the Revision field appears on the Add Build Configuration screen. If you specify the board revision in this field, then its value will be passed to the west build command using the <board>@<revision> syntax.
How to edit build configurations
You can make changes to the configurations for any application you have already built. For example, you can edit a build configuration to enable or disable one of the optional checkboxes available on the Add Build Configuration screen (Build after generating configuration, Use sysbuild), or select a different Optimization level.
To edit build a configuration, complete the following steps:
-
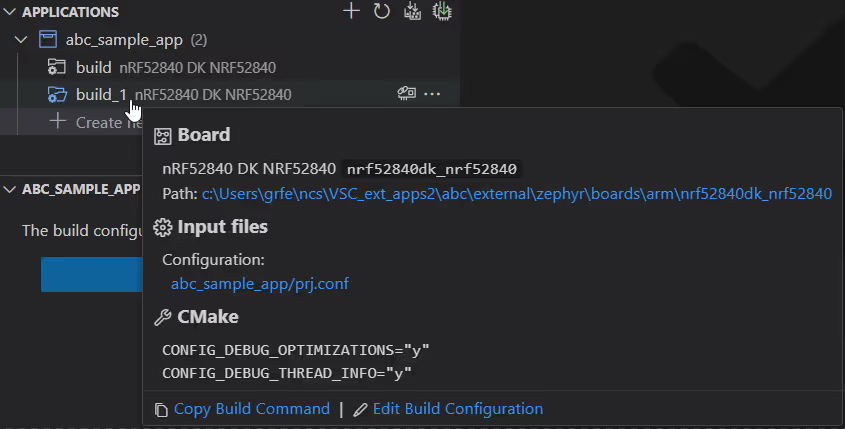
In the Applications View, hover with your mouse over the build folder that contains the files you want to edit. The build configuration details notification appears.
-
Click on Edit Build Configuration at the bottom of the notification. The Edit Build Configuration screen opens, with the Build after generating configuration checkbox option selected by default.
- Make the desired edits.
- Click on Build Configuration to save your changes.
The build configuration is rebuilt with the new configuration.
Tip
You can customize the Build action by assigning different tasks to it. Read Build and flash task configuration for more information.
How to flash a build configuration
Once the build configuration is ready, complete the following steps to flash the build configuration:
- Make sure that you have selected the build configuration you want to flash. The selected build configuration has its name highlighted in the Applications View.
- Connect to a device using default or preset configuration values.
- Click Flash in the Actions View.
The extension flashes the build configuration onto the selected connected device. If you created a sysbuild configuration, the extension flashes all images of that configuration in a sequence.
How to save a build configuration as a preset
You can save a build configuration you have made for your application as a CMake Preset, which stores the specific settings required for the build. Saving a preset stores this information in a CMakePresets.json file. This allows you to share build configurations when working with others.
Note
Sysbuild configurations cannot be saved as presets.
To save a build configuration:
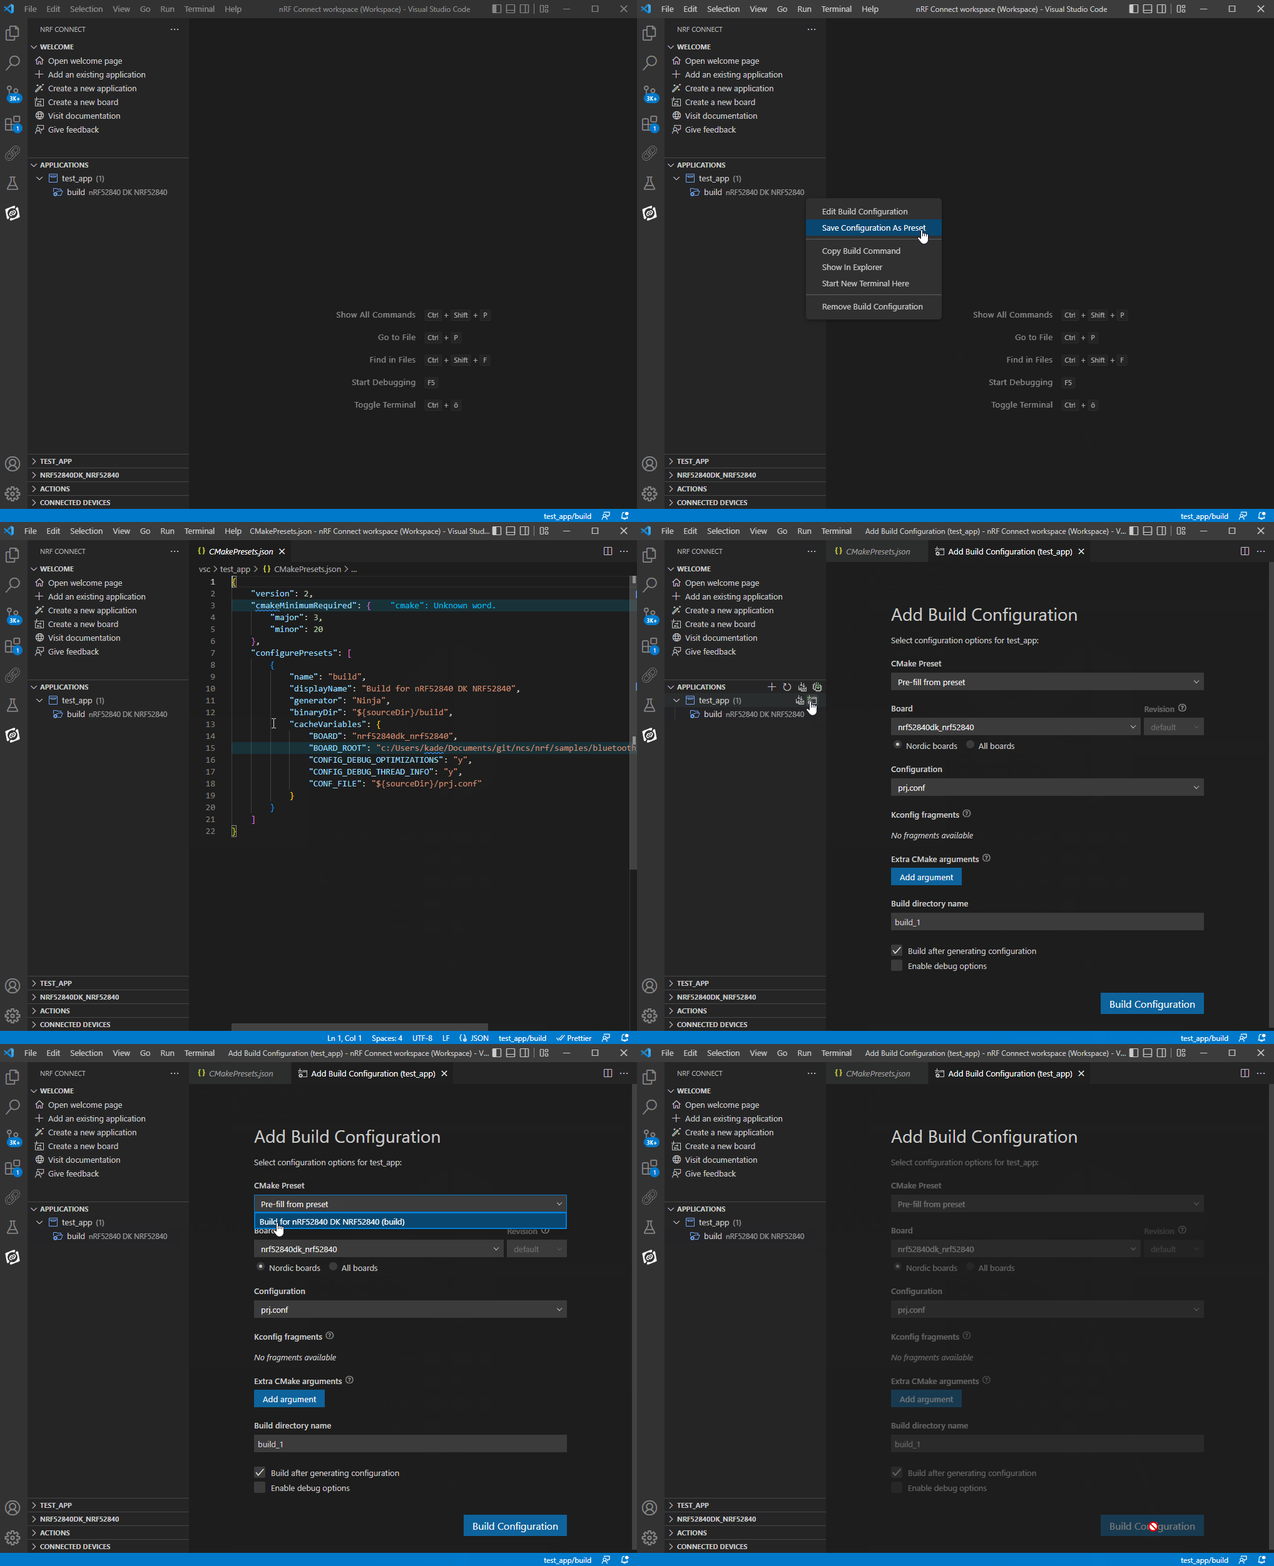
- Hover your mouse over the build folder.
- Click on the menu icon More Actions > Save Configuration As Preset.
This action saves the current build configuration to the
CMakePresets.jsonfile, which appears after completing the action.
Alternatively, you can run nRF Connect: Save Configuration as Preset from the Command Palette, which also saves the build configuration to the CMakePresets.json file.
How to create a build configuration from a preset
The CMakePresets.json file can be applied to an application build in two different ways:
From the Applications View
Complete the following steps in the Applications View:
- Hover your mouse over the application name. A couple of icons appear.
- Click on the icon Add Build Configuration to open up the screen for adding a build configuration.
When you have a
CMakePresets.jsonfile in your project, the form will feature a CMake Preset field. The field has a drop-down menu with the currently available CMake Presets. - Select one of the CMake Preset options. The appropriate fields in the form will be filled with the values from the preset.
- Click on Build Configuration.
From the Panel View
Run the following command in an instance of the nRF Connect terminal profile, one of the three dedicated terminal profiles in the Panel View:
west build -d ${targetDir} -- --preset ${presetName}
How to update a stale build configuration
A build configuration can become stale if it has been built with nRF Connect SDK or Toolchain settings different than the currently selected nRF Connect SDK and toolchain versions. An indication that your build configuration is stale will be a notification in the Details View.
To update a stale build configuration, run the Pristine Build option from the Actions View.