Working with west
You can interact with west in several ways, for example by calling commands in the Command Palette or by using the Source control UI.
How to create a west workspace
To create a west workspace that will include one or more workspace applications, complete the following steps:
- Open the source folder of the application in the VS Code workspace. This application will become a workspace application at the end of this procedure.
- In the Welcome View, click Manage SDKs. A quick pick menu appears.
- Click Create West Workspace.
This all-in-one action moves your application one level down into an
applicationdirectory, creates a west manifest file that matches the current active SDK, and then automatically begins to set up the workspace around it by callingnRF Connect: West Init. - Run the
nRF Connect: West Updatecommand from the Command Palette. You can follow the progress of the update in the Output terminal.
Note
If you happen to create a west workspace without initializing it, it will contain a manifest file that is not linked to the active SDK. In such cases, a warning message appears in the Status Bar, where you can initialize the west manifest or remove it.
How to update a west workspace
Updating west workspace regularly ensures that your west workspace state is matching with the state of the west manifest file. This is required in several situations, for example when you check out a different revision in your manifest repository. Your workspace needs to be updated to include the project repositories that the new revision expects.
The extension will generally display a warning or notification about the need to update the west workspace.
To update a west workspace manually, you can use one of the following options:
- In the Command Palette: the
nRF Connect: West Updatecommand. - In the Welcome View: the West Update action under Manage west workspace.
In either case, a notification appears and west begins to update.
How to manually trigger status update
To trigger a status update, use one of the following options:
-
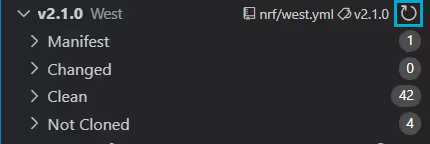
Open the Source Control View and click the refresh button on the west source control line in Source control UI.

-
Open the Command Palette and type
nRF Connect: West Refresh.
How to change the west manifest
This option is useful for those who use upstream Zephyr and need to frequently switch between the two manifests or different versions.
You can change the west manifest from different areas of the extension:
-
In the Source Control View, click on the manifest path located towards the top of the View.

-
In the Command Palette, type
nRF Connect: West Set Active Manifest. -
In the Welcome View, click Manage west workspace > Switch West Manifest Repository.
Each of these actions displays the list of available west manifests.