How to create devicetree files
Devicetree source files, which include *.dts, *.dtsi, and *.overlay files, are used by Zephyr and the nRF Connect SDK to describe hardware, provide hardware initial configuration, and modify the hardware-related configuration of an application.
Important
Make sure you edit a .dts or an .overlay file that you created. Directly editing .dts or .overlay files that come with the nRF Connect SDK installation may have unintended consequences to other boards or to applications that use the same board.
Complete the following steps to create an overlay file:
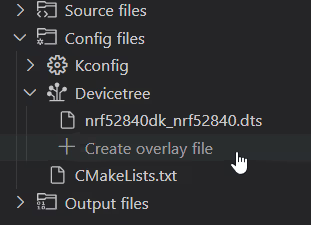
- In the application's Details View, click on the Config files to expand the directory.
-
Click on Create overlay file.

When the creation process is complete, a notification appears asking you whether to run a pristine build.
-
Click the Full Pristine Build button in the notification. When creating or removing an overlay file, a pristine build must be run for CMake to include the overlay file in the configuration. For more information about how pristine builds work in the nRF Connect SDK, see the Actions View page in the UI reference.
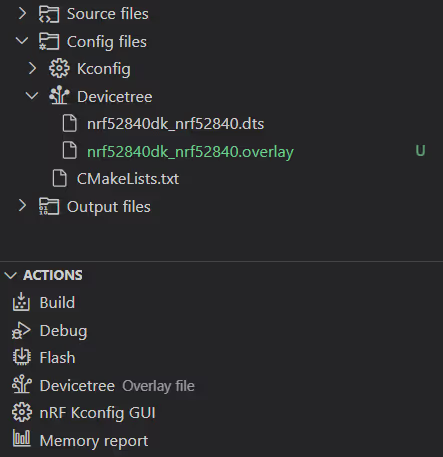
The .overlay file appears in the Devicetree directory under the application's Config files in the Details View and is selected as the devicetree context file for the Devicetree button in the Actions View, as in the following example.

Note
If your application has two build configurations and both use the same .dts board file, the overlay file you create for one of the build configurations will be automatically applied to the other build configuration, given that the name of the overlay file matches the board file name.
To work around this, rename the overlay file and select it specifically for the build configuration in which you want to use it.
With the overlay file created, it is automatically added to your current configuration and you can start editing it. Use one of the following methods:
- The Devicetree Visual Editor, which is the recommended tool for inspecting the devicetree context files and editing devicetree source files in the extension.
- Manual editing in the Editor, taking advantage of the Devicetree language support.